Tuesday 27 April 2010
How to Make a Concrete Tree face
 Add character to your garden tree by making it a face. I gave my tree a grumpy face to scare the neighbours!
To make a tree face you will need...
Plasticine
Liquid Latex
Concrete mixture
Steel wire to make hanging loops.
First mould the features of your tree face from Plasticine. Don't make the features less than half an inch thick in any part as the finished item will be prone to snapping.
You also need to consider the tree you are making the face for. If it is a slim tree trunk, you may need to make slim features to ensure they will fit. If it is a fat trunk, you can make larger features. A general rule of thumb is to make the features about the same size as your own.
When you have completed the face, stick each individual part onto a ceramic surface, such as a spare floor or wall tile, or an old dinner plate. You need to make sure that their is about half an inch of ceramic around your plasticine shape.
Shake the liquid Latex and brush it onto your plasticine shape getting in to all the nooks and crannies. You also need to bring the latex down onto the ceramic and paint a half inch area around the shape. This creates a lips on the mould that will be helpful during casting the mould.
Do read the Liquid Latex instructions on the bottle and make sure you use the Latex in a well ventilated room.
Once you have applied the first coat of latex you will find that it makes bubbles on the surface. Blow on the bubbles to remove them. If you do not remove the bubbles you will find that the bubbles will be present on the finished item.
You will need to apply 25 coats of latex in this way. It will take a few days to complete taking the latex drying times into account. It's a good idea to make a tally chart of the applied coats. It is very easy to loose track of how many coats of latex you have added.
When the last coat has dried you can remove the latex from the plasticine and your ready for casting the moulds.
Upturn the moulds in place them in a pile of sand to support them whilst the concrete dries. If you have given your face a big nose for example find a suitable container to fill with sand around your mould to support it.
Mix 4 parts sand to 1 part Portland cement. Make the cement a runny consistency so that you can pour it into the moulds. Once you have filled the moulds, make a little hanging loop from some wire. Make the loop so that the ends cross over - it will look a bit like a fish. Push the crossed ends into the cement at the top of the feature.
Leave the mould in a cool dark place to dry our slowly for 5 days.
You can now turn your tree face out and screw it to the tree. Concrete takes a year to set completely and then it will be at 'full strength' until this time try to be careful not to damage the face - especially the nose.
No Room for a Pond to Grow Water Lilies

Do you love water lilies but don't have room in your garden for a pond? Try this neat idea and grow a water lily in patio tub.
Find a nice planter that suits your garden, and seal the hole at the bottom (if there are any) with some bathroom silicone sealant. Allow the sealant to dry completely before adding water.

Place the tub in the location where you want it to be long term - Once the tub is filled it will be heavy.
You can now fill the planter with water and submerge the lily in it's plant pot into the pot.
Follow the plant care guidelines when creating the water lily tub and to maintain the plant.
Wednesday 21 April 2010
Friday 9 April 2010
How to Make Comic Key Rings
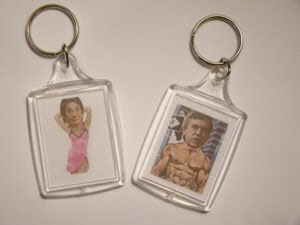
Special attributes that make a Perfect Valentine's gift are things like - the gift being personal to the person you are giving it to. The give conveys your love for the person you are giving it to. the gift fills us with a warm and joyous emotion and something that reminds us of love all year round. A home-made Valentines Keyring ticks all of the Perfect Valentine's Gift boxes - they say 'I love you', they have a personal and humorous image of your Valentine and you see and use the Keyring every day.
To make a Valentines Keyring you will need...
A Photo Keyring (you will find these inexpensively at the Craft shop)
A good photo of your Valentine,
Micrografx Picture Publisher or a similar Graphics Package Software
Photo Paper
And a Colour Printer
First you will need to save one of the character template images below.
    |
  |
You will also need to save one of the 'Keyring back' designs from below.
    |
    |
 |
Finally you will need to save the 'Face Cut Out' image below.
 |
First in your Graphics package, open your photo of your Valentine and the Face Cut Out Image.
Working on the Face Cut Out image, you need to create a mask.
To make a mask, click on 'Mask' from the top and then Chroma Mask from the list. This will open an options box.
Set the Mode to -
Choose the first pipette and select the black oval.
Click ok to create the mask.
Copy the mask and past it onto the photo of your Valentine. Use the Selector Transform Tool (on the left) to change the length, width and size of the oval so that encompasses the head of your Valentine.
When you are happy with the image, use the Crop Tool (on the left) to cut out the Face cut out image containing your Valentines face as one square.
Then click Object from the top, combine and all objects with base.
Next we need to make a mask of your Valentines Face, but first we reduce the image to a more manageable size.
Click on Image from the top, and select size, this will open up an options box.
In the drop down box on the right select Pixels.
Set the width to 70
And click Size
This will make the image much smaller.
To make a mask of this image, click on 'Mask' from the top and then Chroma Mask from the list. This will open an options box.
Set the Mode to -
Choose the first pipette and select the white background.
Click ok to create the mask.
Copy this mask of the head and paste it onto the character template that you have chosen.
Use the Selector Transform Tool (on the left) to make the head small if needs be. Move the head so that if covers the pink oval on the template. When you are happy, save the image on your computer. Click File from the top, Save as, and save into your pictures.
Also with your graphics package you can personalise the Keyring back graphic with a message or with your sweethearts name.
Print the images out onto Photo Paper. Cut out the images with scissors and fit them into the Photo Keyring.
To open the Photo Keyring - Use a pin as a lever at the base of the Keyring. You will see a small hole where the pin should go, and flip it up. Then insert your photo, and snap the Keyring closed again.
How to Make Soy Candles - Cheap Supplies and a Total Cinch to Make
 By Russ Cooper
In this article we are going to talk about how to make soy candles. First of all out all the different kinds of candle making wax there is to choose from why would someone specifically choose soy wax? Well for one reason soy wax works very well with scented oils and is capable of giving off profound fragrances. These candles will fill your room with such a wonderful fragrance that will linger long after the candle is extinguished. Another nice feature about soy candles is they are among the prettiest because they have a very nice glossy sheen to them. Learning how to make soy candles is real easy as well as very inexpensive.
Go to your local craft shop and get your soy wax, it comes in chips. Get a spool of wick. Get wick tabs which you will place on the bottom of your wick. You will need glue or a glue dot to put on the bottom of your wick tab. You will glue this to the bottom center of your mold to hold the wick in place when you pour the melted wax in the mold. Speaking of which, get some molds. Get a long stemmed candle thermometer (called a candy thermometer). Get a paint stick for stirring the melted soy wax.
Get pretty colored dye chips the color of your choice. Get some scent. There are a very wide variety of candle scents to choose from so choose one that you like. You will need a scale to weigh your wax. You may purchase let's say a 16 ounce mold which would mean you will measure out 16 ounces of wax to fill the mold. And that's it for the supplies.
Put your soy wax chips in a pot and heat on low-medium and stir with your paint stick until it is around 185 degrees. Add your dye chips and your fragrance oil and stir these in thoroughly.
Glue your wick tab in the center bottom of the mold and let the wax cool to about 135 degrees (if you are impatient just get it below 160 degrees) and then pour it into your mold. Now center the wick in the top of the mold. A good way to secure it in place is to place one of those coffee stirring sticks across the top of the mold and bend the wick over it.
Let it cool for a few hours until it is room temperature and hard and remove it from the mold and you have your beautifully scented soy candle.
There are some great benefits in knowing how to make soy candles besides their beauty and fragrance. By making them yourself they will cost you a small fraction of the price it would cost you to buy ready made candles at the store. You can even undercut the store quite a bit and still make a nice profit if you want to sell them.
To find out more on how to make soy candles or beeswax, gel, paraffin or any other kind of candle check out this website http://candledesigning.com/ now.
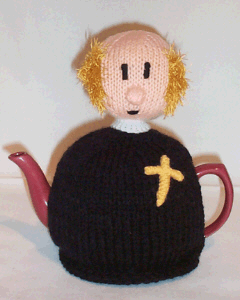
Perfect Valentines :: Tea Cosy Folk :: Santas Postbag:: Halloween Mania ::Zafyna


Thursday 1 April 2010
3D Cross Paper Craft
| This is a cute, simple paper craft that results in a 3D ornament you can hang around the room. |  |
Materials:
- printer
- paper (I prefer construction paper as it's a bit sturdier)
- scissors
- OPTIONAL: crayons (or paint, markers, etc)
- string, thread, ribbon or wool
Instructions:
- Print template (there is only B&W available) and color as desired
- Cut out the template pieces (may require adult assistance and can be done before hand.
- Cut on one of the dotted line right up to the center.
- Pick out the two matching cross (this is good practice for young children!)
- Slide the cross together, top to bottom
 all I have is the snowflake image to show you how it's done
 - Glue a ribbon or thread onto the top (or hole punch a small hole and tie a ribbon through (I used a thread and it worked really well)
Options:
- instead of simply coloring the template, here are some thoughts for alternatives:
- sparkles or sparkle glue
- Salt Drip
- 3 parts flour
- 1 part salt
- food coloring
- water
Mix together 3 parts flour, 1 part salt, food coloring, and enough water to make a dripping consistency but not too runny. Use a popsicle stick to drip onto paper shapes. Will dry hard and sparkly.
- sparkles or sparkle glue
Notes:
- There are some brief instructions written right on the template
- If you want your cross to be two-sided, print two templates out and glue matching cross together back to back. Do everything else as directed.
- Close template window when done printing to return to this screen.
- Set page margins to zero if you have trouble fitting the template on one page (FILE, PAGE SETUP or FILE, PRINTER SETUP in most browsers).
Template
Palm Leaf Fold and Cut Craft
| This is a fun Palm Sunday craft that works a lot like cutting out paper snowflakes. The fronds end up being large enough that the children can carry them around waving them for a Palm Sunday parade. |  |
Materials:
- printer
- paper
- scissors
- paper clips
- green construction paper
- scotch tape
- OPTIONAL: Green pipe cleaner
Directions:
- Print out the template of choice. (the templates have the directions on them)
- Cut this template along the dotted line.
- Fold a piece of green construction paper in half and paper clip the template so the dotted line is along the fold.
- Cut through the template and both layers of construction paper along the black lines.
- Discard the template (unless you want to make more leaves).
- Unfold the construction paper to see your finished palm leaf.
- Tape a green pipe cleaner as a stem
or - Roll a second piece of green construction paper into as tight a tube as possible and tape it so it will stay. Tape that to the center as a stem
- Close the template window after printing to return to this screen.
- Set page margins to zero if you have trouble fitting the template on one page (FILE, PAGE SETUP or FILE, PRINTER SETUP in most browsers).
Template (color) or (B&W)
(the templates have the directions on them)
Subscribe to:
Posts (Atom)