Special attributes that make a Perfect Valentine's gift are things like - the gift being personal to the person you are giving it to. The give conveys your love for the person you are giving it to. the gift fills us with a warm and joyous emotion and something that reminds us of love all year round. A home-made Valentines Keyring ticks all of the Perfect Valentine's Gift boxes - they say 'I love you', they have a personal and humorous image of your Valentine and you see and use the Keyring every day.
To make a Valentines Keyring you will need...
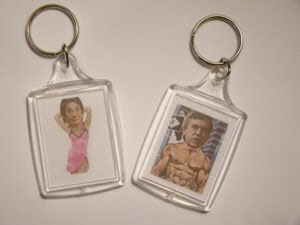
A Photo Keyring (you will find these inexpensively at the Craft shop)
A good photo of your Valentine,
Micrografx Picture Publisher or a similar Graphics Package Software
Photo Paper
And a Colour Printer
First you will need to save one of the character template images below.
    |
  |
You will also need to save one of the 'Keyring back' designs from below.
    |
    |
 |
Finally you will need to save the 'Face Cut Out' image below.
 |
First in your Graphics package, open your photo of your Valentine and the Face Cut Out Image.
Working on the Face Cut Out image, you need to create a mask.
To make a mask, click on 'Mask' from the top and then Chroma Mask from the list. This will open an options box.
Set the Mode to -
Choose the first pipette and select the black oval.
Click ok to create the mask.
Copy the mask and past it onto the photo of your Valentine. Use the Selector Transform Tool (on the left) to change the length, width and size of the oval so that encompasses the head of your Valentine.
When you are happy with the image, use the Crop Tool (on the left) to cut out the Face cut out image containing your Valentines face as one square.
Then click Object from the top, combine and all objects with base.
Next we need to make a mask of your Valentines Face, but first we reduce the image to a more manageable size.
Click on Image from the top, and select size, this will open up an options box.
In the drop down box on the right select Pixels.
Set the width to 70
And click Size
This will make the image much smaller.
To make a mask of this image, click on 'Mask' from the top and then Chroma Mask from the list. This will open an options box.
Set the Mode to -
Choose the first pipette and select the white background.
Click ok to create the mask.
Copy this mask of the head and paste it onto the character template that you have chosen.
Use the Selector Transform Tool (on the left) to make the head small if needs be. Move the head so that if covers the pink oval on the template. When you are happy, save the image on your computer. Click File from the top, Save as, and save into your pictures.
Also with your graphics package you can personalise the Keyring back graphic with a message or with your sweethearts name.
Print the images out onto Photo Paper. Cut out the images with scissors and fit them into the Photo Keyring.
To open the Photo Keyring - Use a pin as a lever at the base of the Keyring. You will see a small hole where the pin should go, and flip it up. Then insert your photo, and snap the Keyring closed again.


