Wednesday, 30 June 2010

Best Art and Craft Projects For Children's Parties

By Criss White

Kiddie parties should be eventful and full of fun activities. Nowadays, it feels like the only thing that kids do is playing online games. What a pity that these children lose out other fun activities. It's high time to get their creative juices pumping! Pack up those video games, shove them in the closet and host a party that is a sure hit. Try these kiddie arts and crafts with your children and have fun yourself.

1) Easy homemade party cupcakes
Simply buy regular or chocolate cupcakes. Obtain a selection of colorful icings and let the children decorate the cupcakes themselves. To make the cupcakes one of a kind, add more decorations like sugar flowers, gum drops, chocolate chips or fresh fruits. What's wonderful is that they get to eat or keep their cupcakes. Make sure to prepare a small working station where they can make a mess.

2) Environmentally friendly gardening
One good way to keep the children busy and to promote caring for the earth is to have a gardening event. Prepare small pots, soil, seedlings/ plants, paint and paint brushes. Pick gardening tools which are best for kids like hand shovels, latex gloves and watering cans. Provide a work area where the kids can paint the pots with their own designs. Let them to fill the pots with dirt and seeds, encouraging them to care for their plants so they will grow. These are great party favors that children will remember for months.

3) Customized fashion flip-flops
This next activity is to develop the fashion designer in the child. Simply supply the children with cheap flip-flops of different colors, shapes and sizes. From gift supply store, you can get some ribbons, glue gun and a assortment of trappings. Trimmings can range from floral accents, gemstones, beads and feathers. You can pick multiple embellishments or stick to certain ones that are in-line with your party theme (Example: for a summer theme, choose floral accents and shells). In a workstation, allow the children to select their flip-flops and embellishments. By using the glue gun, kids can create their flip-flops as they wish. This is a useful, practical and fun gift they can actually wear.

4) Jewelry design challenge
Young girls like to wear accessories. Buy various colored beads and elastic threads from a craft supply or toy store to make necklaces, bracelets or anklets. One great tip is to find "letter beads" which they can use to spell-out various words. This is a wonderful activity that kids will surely enjoy. They can make their own accessories or make some for their friends. Remember, kiddie parties are all about having fun. Provide your energetic guests with the tools they will need to make your party a wonderful arts and crafts event.

Criss White is a professional author on baby and wedding information. For more arts and craft related tips, like diaper cakes (http://www.mybabyshowerfavors.com/diapercakes.html), visit My Baby Shower Favors blog.As long as the credits and resource box are intact and the hyperlinks functional, you are welcome to share this article in your newsletter, on your website, or e-zine.

Free Sewing Patterns

Laura Marsh Designs Orginal Sewing E-Patterns


FREE PATTERNS

You'll find a selection of free patterns for you to try at home. Most of the patterns you'll find here are very simple patterns, so if you're looking for something a little more challenging why not have a look at some of the other patterns avaliable on the site!


Free Draw String Trouser Sewing Pattern 8-22

Free Draw String Trouser Sewing Pattern 8-22

  These trousers are very simple and make up very quickly.   The pattern has had 6cm added around the waist and hips as well as 3cm...


... more info
Free Long A-Line Skirt Pattern PLUS SIZES 22-36

Free Long A-Line Skirt Pattern PLUS SIZES 22-36

This skirt is very easy to make and would be an ideal beginners project.   The skirt is simply made from two pieces of fabric, a front and a...


... more info


Wednesday, 23 June 2010

How to make Nintendo Necklaces


(You can upload sprite pics here and this site will pixelate the pic for you. Make sure the pics are VERY small for it to work best. I mean VERY small. Thanks for the link Yourtiy)

VLoG #115: Showing step by step how to make an 8 bit or 16 bit necklace. While I was in LA the other gamers were calling them the "sWooZie chains" which also has a nice ring to it ^_^

http://bizklimkit.deviantart.com/gall...

http://www.smashboards.com/fzero/embl...

http://www.flickr.com/photos/danny_8b...

http://sdb.drshnaps.com/

Duck from Duck Hunt:
http://i29.photobucket.com/albums/c27...

Cape Mario from Super Mario World (SNES):
http://i29.photobucket.com/albums/c27...

Sonic (one row taller than a standard peg board)
http://i29.photobucket.com/albums/c27...

Yoshi Super Mario World (SNES):
http://i29.photobucket.com/albums/c27...

extra sprites: http://www.spriters-resource.com/

**For those of you who can upload videos, post some video responses when/if you make your own sprite

How to Make Altered Paper Jewelry


In this "Look, Learn & Create" video, learn how to make altered paper jewelry with Craftside blogger/author/craftster Stefanie Girard and "Altered Paper Jewelry" author Jenn Mason!


How to Make Paper Jewellery - A Great Alternative to the Rising Cost of Precious Metals

How to Make Paper Jewellery - A Great Alternative to the Rising Cost of Precious Metals

By Miriam Beloglovsky

With the instability of prices affecting the precious metals market and the skyrocketing costs of jewelry making supplies, learning how to make paper jewelry has become an interesting and inviting alternative. Paper Jewelry offers versatility and the opportunity to contribute to a green economy by recycling materials readily available at home.

The main question to ask as you learn how to make paper jewelry is how to transform the material into a high fashion and artistic medium. With this in mind, selecting papers that have intricate artistic designs can make a difference in your work. Learning to fold the paper integrating origami into the design will also enhance the jewelry you make.

Paper has been used widely by contemporary jewelry artist. They have integrated it into their work in a variety of ways; from casting to folding, from cutting to creating three dimensional forms. Many artists have made their own papers from recyclable materials and others use recycled paper to create their work. The possibilities are endless.

Learning how to make paper jewelry includes finding different ways of making the jewelry permanent and sustainable. Laminating and using different lacquers to protect it are just two of the many solutions available. When you laminate paper in increases its thickness and adds support. You can laminate the paper using other materials such as linen and other fabrics. When using glue to laminate you need to rub the paper with a soft cloth to smooth the paper and prevent buckling.

Paper is fairly easy to work with and can be cut and scored with a craft knife. Once you have cut the paper, you can use the knife handle to score the paper which will make it easier to fold. You can always use tape to reinforce a fold.

Learning how to make paper jewelry can also save you time and money. You can create prototypes of your jewelry designs before you execute them in metal.

Integrating stamping into paper jewelry can bring dimensionality and interest to a piece. You can use the jewelry design stamps on the paper once it has been laminated to create intricate designs. You can also use the stamps with inks of different colors to add interest to a piece of jewellery.

Paper can be combined with silver, copper, wood, by stitching, riveting and gluing. Paper can be made into beads that can be combined with other gemstones to create Bohemian Jewelry. The main thing is to be creative and let your imagination run wild.

Papers from Japan can help you achieve that high fashion look when learning how to make paper jewelry. The beautiful patterns found on Chiyogami are inspired from kimono textile motifs and feature breathtaking designs from nature. Many of the Japanese papers feature both antique and contemporary patterns of plum blossoms, lotus, lilies, bird cranes, and other motifs that embody metaphor of good fortune, bountiful long life and elegant grace. Thus Japanese paper jewelry is worth investing in because of their symbolic values.

A wet sheet of paper can be pressed into a mold. Once the paper dries it retains the shape of the mold. Paper can be soaked into a liquid made of water and glue or it can be made into a pulp and then presses into the mold. This formed paper shapes can then be used a cabochons and bezel st into silver or copper metal.
Learning how to make paper jewelry has also helped many impoverish communities to generate income. Women in Uganda have been creating beads out of recycled paper and selling them in the 'Fair Trade Market." This has allowed them to become self reliant and to support themselves and their families.

To learn more about jewelry making visit theartofmakingjewelry.com
Jewelry Making Tips and Techniques - A Resource Guide for Artist and Designers. This website was created to share information about the art of making jewelry with other jewelry artist and designers.


How To Make Crazy Dazzle Jeans

How To Make Crazy Dazzle Jeans
Summer crafts

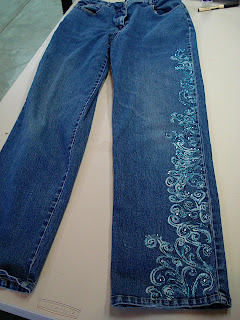
Funk up a dull drab pair of jeans with a little bit of flower power. Great for kids jeans or hippie ladies jeans or a project for a teenager, you're bound to be a trend-setter in funky daisy jeans. Quick and easy to do and not a great deal of artistic flare is needed.

To make daisy jeans you will need...
A pair of jeans (cheap jeans are ideal), thick bleach, artists paintbrushes, thick card, scraps of bright fabric (look in the patchwork box in your local haberdashery) and a needle and thread.

Lay the jeans out flat on a table. Move anything from the area that would be spoilt should it come into contact with the bleach.

Push some thick card up the inside of the right leg of the jeans. This creates a firm base and prevents bleach from seeping through to the fabric below.

Along the bottom hem and up the side seem of the leg to the knee draw 4 to 8 daisies with a biro. The flowers can be assorted sizes. Start off with an "O" shape at the centre and draw six petals or so coming off from the daisy middle. Just draw the flower heads - no stalks or leaves.

Once you are happy with the design go over the daisies with bleach. Pour some bleach onto a plate (thick bleach is best) and using a paint brush, brush the bleach over the biro lines.

You need to work quickly because not only will some brush bristles melt, but the bleach will also be bleaching and attacking the fabric of the jeans. Really you want all the daisies bleached to a similar colour.

Reapply bleach to areas you feel needs it.

When all the daisies have turned white, immerse the jeans into a bowl of water and rinse three or four times to get all of the bleach out. Do not put them into the washing machine because the bleach will perish the rubber seal of the washing machine. Leave the jeans to dry.

You can leave the jeans like this, or you can give each daisy a coloured centre.

Here's how to colour centres...
Draw around a mug or something onto the back of some brightly coloured fabric. Cut out and with a needle and threads sew a row of running stitches around the outside of the fabric circle. Draw the running stitches up so that the raw edges are drawn in. Flatten the circle out, this is your daisy centre. Adjust the tightness of the "Drawing up" to make the centre bigger or smaller to fit each particular daisy. Sew or Wonderwed the daisy centre into place on the jeans. Use invisible stitching, hemming stitch would be good.

Feeling adventurous?

Try covering the jeans in daisies, the front and back. Or just across the seat of the jeans. The funky design possibilities are endless.

Wednesday, 16 June 2010

Lunchtime In Fairyland - Recipes & Tutorial


Fed up with dull dinner times? Can get the kids to eat? Have some Fairy Tale food times!

It's no secret that I adore red and white toadstools and I've been wanting to add them to a bento box design for a while now, so this meal is "fairy food"!

The main ingredient, mini meatloaf, was inspired by the muffin tin meal recipes that have become so popular for single-serving bento-size portions, but the best part is that you can make them in advance and stash them in the freezer until you need them. My mini meatloaf muffin is decorated with cheesy pepper ring flowers.

In the larger box with the meatloaf are some fresh clover sprouts, broccoli, pea pods and of course, the pretty little toadstool mushroom. I am super excited to share how I made this one!

In the smaller box there are orange wedges, pear slices, cherries, broccoli and a mini yellow bell pepper that I used as a container for my veggie dip. Sitting up top is a homemade snail roll!

Visit Squidoo for the Recipes...