Saturday 26 November 2011
Comic Strip Nail Art
Comic strip nails! I used an archie comic book. you can also find comic strips to use in your local newspaper like charlie brown, garfield, dennis the menice, etc.
I found Comic Strip Nail Art on Youtube and thought it was a must try! I love the newspaper nails, and sheet music would look fab wouldn't it.
Tuesday 22 November 2011
Decoupage Your Own Decor

Decoupage is a true art form that's perfect for all of your home accessories and décor. This great arts and crafts project creates a complicated look that's not really all that complicated. Small pieces of cut out papers from magazines, tissue paper and even gold leaf can be used to layer decoupage into any design you like. After the pieces are attached to your favorite décor item, a few layers of decoupage lacquer are applied to the surface. This not only seals in the cutouts, it also makes it appear that the design is one smooth piece like a photo or drawing. Use this guide to decoupage and you'll be on your way to getting an affordable and adorable design on any home décor item in your home.
Prepping the Surface
Before you begin any decoupage project on your home accessories, you'll need to prep the area first. The area must be able to accept a glue to work. Plastic surfaces may need to be scuffed up with some light grain sandpaper to allow the glue to adhere correctly. Glass surfaces may need a quick acid etch with one part muriatic acid and four parts water. Acid etching is dangerous so use the correct safety equipment when handling this material.
Cutting out the Pattern
Materials like paper are easy enough to cut out and can be easily done with a regular pair of scissors. Paper conforms well enough to work with most decor and can easily wrap around round objects with ease. Stiffer materials like cardboard may need to be softened to bend around curved house décor.
Glue it Down
The medium that is used to glue down decoupage is as simple as it gets. Regular white Elmer's glue works great with most materials like wood or cloth. Some synthetic fabrics may require the use of special fabric glues. Wood glue can be used for most craft materials like ceramics, but some materials may require the use of special fixatives to provide a surface for the adhesive to bond to. Glue and place your decoupage materials on your favorite wall art and décor. Allow the materials to dry for 24-48 hours before applying a varnish. This way, if any decoupage materials peel away from the décor, you'll know you need a different adhesive.
Decoupage It
Once the paper is in place and your design looks good, it's time to cover it all up with a decoupage medium. A varnish or lacquer is commonly used to create the decoupage. Some decoupage materials are already premixed and ready to go. For a cheap alternative to store bought decoupage medium, wallpaper paste can work perfectly. Add several layers until the decoupage medium is flat and smooth across the décor. This may take many layers, so be patient and let each coat dry before applying another.
For all your home decor needs for all kinds of furnitures, check out Arcadian Home Decor.
Sunday 13 November 2011
How to Make a Robin Nest Box

You can buy Robin Nest boxes online or at your local garden centre, they cost around ten to fifteen pounds. However, for the fraction of the price, you can make your own Robin box quite easily. It’s a great little project to make the box and it’s very rewarding when robins take up residence.
To make your Robin Nesting box you will need: Wood – a decking plank is ideal and only costs around 3 pounds, and screws.
You need to cut the decking plank into the following lengths-
26cm long for the back panel
15 cm for the roof panel
8 cm for the front panel
The base needs to be the same length as the planks width.
The 2 sides need to have a sloping top, the back edge should be 18cm and the front edge should be 13cm
Note: The two sides need to be cut out so that they are inverted if you are using a decking panel with a textured side.
When you have cut the wood out give it a light sanding to get rid of any rough edges or splinters. Don’t worry if your sawing isn’t perfect, the robins won’t mind about the rough and readiness of their new home, they’re not too house proud!
Follow the photo diagram to assemble the robin box.


On the back panel that sticks up from the roof, you will need to drill a hole through the wood to mount the nesting box.
The great thing about making a robin box from decking planks is that the wood has already been treated so you don’t need to paint it. Having said that, if you do want to protect your nest box further, use a water-based preservative that won’t harm your feathery tenants.
Site nest boxes where birds won't be disturbed, away from prevailing winds, rain and the full glare of the sun. Make sure the box is 2m to 5m from the ground and there are no nearby footholds for predators.
Woolly Hat Knitting Pattern to Match Michelle Szeghalmi's Evangeline Fingerless Gloves
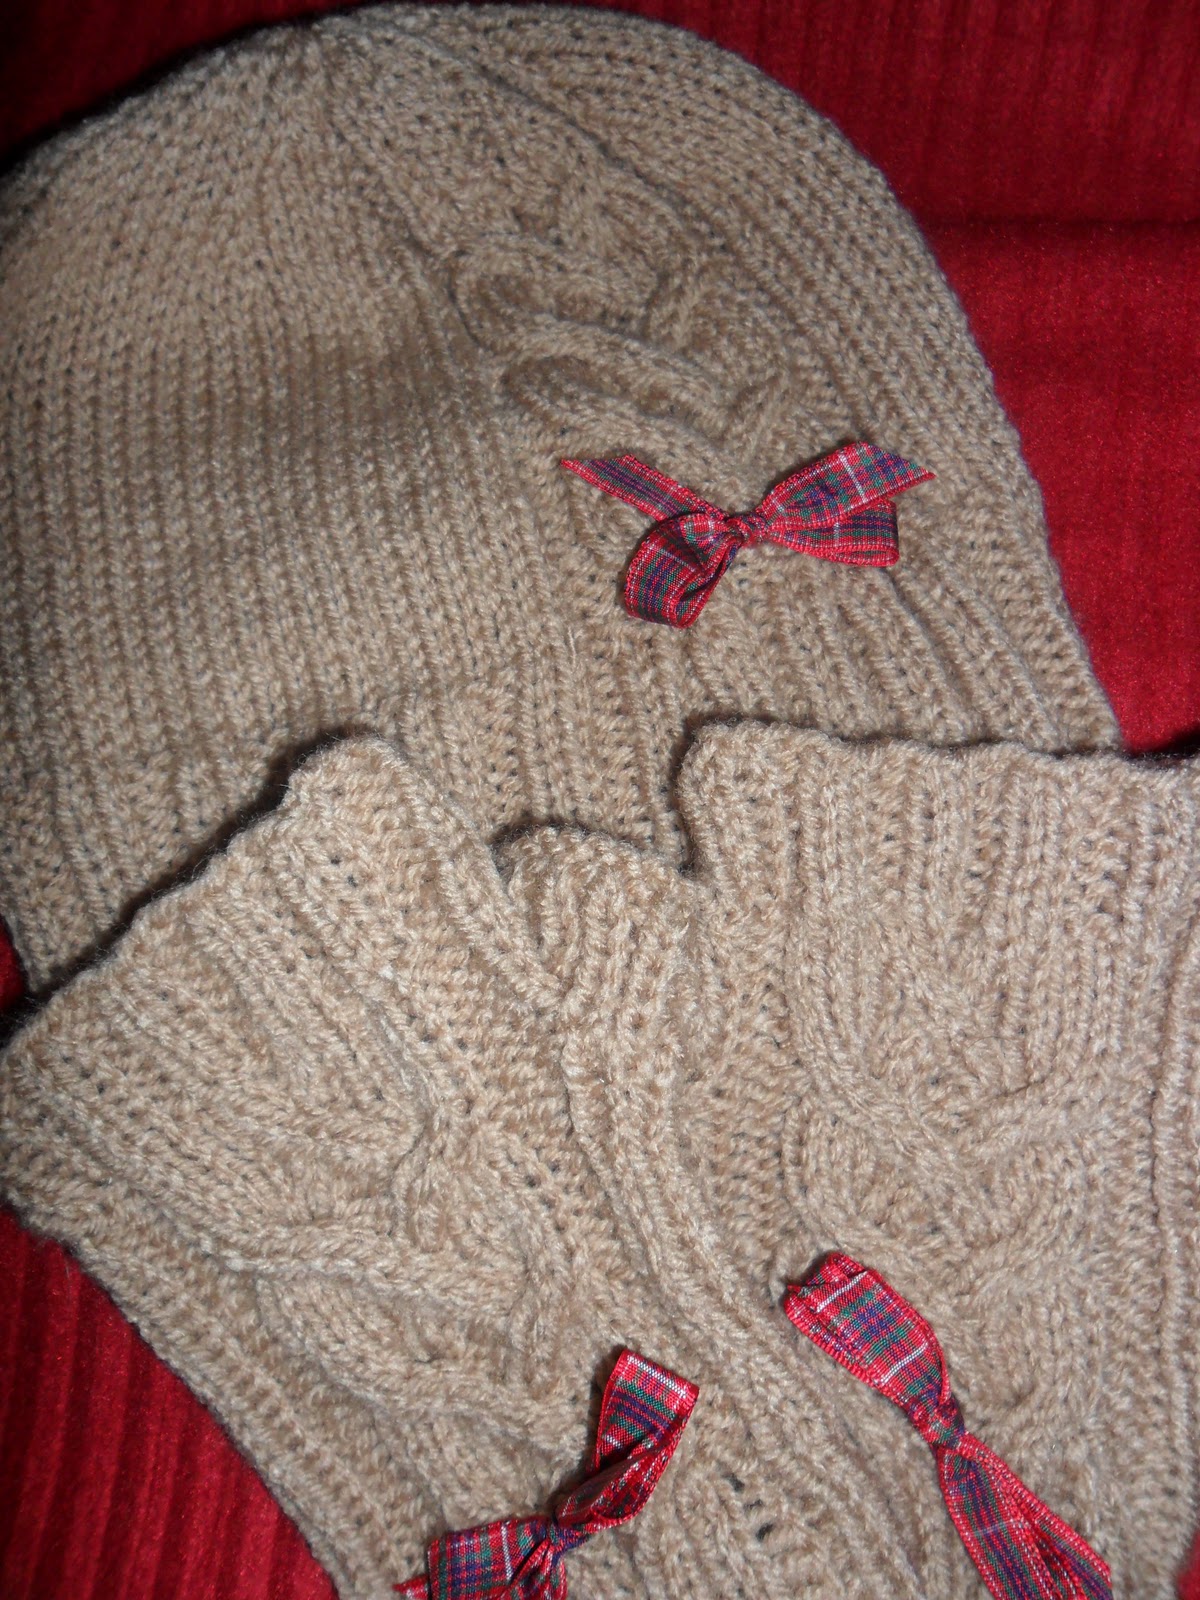
 I recently knitted a pair of Evangeline fingerless gloves designed by Michelle Szeghalmi. I found the gloves pattern free online. I had knitted a pair of elbow length gloves about a year ago for my daughter, and now I wanted to knit the short pair as a Christmas present for Nanna, but I also wanted to knit a hat to match. So here is the hat I knitted, incorporating the same pattern panel as in the gloves by Michelle Szeghalmi.
With the same wool as used for the gloves and on size UK number 7 needles cast on 88 stitches and work 14 rows double rib
*K2, P2* rep to end.
Then Knit 24, P2, work first row of Evangeline cable pattern, P2, Knit to end
Alternate rows, knit the knits and purl the purls.
Work three sets of the Evangeline pattern (32 rows in all) and then keeping the pattern as true as possible shape the top as follows.
Row 1: *K6, K2tog* to end
All alternate rows are purl.
Row 3: *K5, K2tog* to end
Row 5: *K4, K2tog* to end
Row 7: *K3, K2tog* to end
Row 9: *K2, K2tog* to end
Row 11: *K1, K2tog* to end
Row 13: *K2tog* to end
Row 15: *K6, K2tog* to end
Thread the yarn through the remaining stitches and draw up and finish off. Sew down the back seam of the hat with fight sides facing.
Finally I threaded a small length of ribbon through the knitting at the bottom, centre of the first pattern row and tied a bow.

Subscribe to:
Posts (Atom)